Sublimation printing is the gold standard for creating retail-quality apparel. By chemically bonding ink directly into the fabric strands, you create garments that never crack, peel, or fade.
If you are ready to move past basic heat transfers and start producing professional-grade clothing, follow this comprehensive step-by-step guide.
1. Prepare Your Equipment and Materials
Before you begin, ensure you have the necessary industrial-grade tools for a high-quality finish:
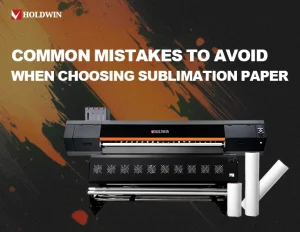
- Sublimation Printer: A high-resolution printer (like the HOLDWIN-1803TX) ensures sharp lines and vivid color reproduction.
- Sublimation Ink & Paper: Use high-release sublimation paper that allows maximum sublimation ink transfer.
- Heat Press: A heavy-duty press is vital for even heat and pressure distribution.
- Polyester Apparel: Sublimation only works on polyester (at least 65%, though 100% is best). The fabric must be light-colored, preferably white.
- Accessories: Heat-resistant tape, butcher paper (teflon sheets), and a lint roller.
| ⚡ Model Spotlight: The foundation of a good shirt is the print quality. Check out our High-Resolution Sublimation Printers for consistent, vibrant results every time.

| 🎨 Technical Insight: The dye-sublimation process is unique because the ink turns into a gas under heat, bonding directly with the polyester fibers rather than sitting on top of the fabric.
2. Design and Print
Create your artwork using high-resolution files (at least 300 DPI) to avoid blurriness.
- Mirror the Image: This is the most critical step. Since the paper is placed face-down, you must flip your design horizontally in your software before printing.
- Check Settings: Ensure your printer is set to “Sublimation Paper” mode for optimal ink saturation.
- Dry Time: Allow the printed sheet to dry completely to prevent smudging or “ghosting” during the transfer.
3. Prepare the Shirt
Pre-treatment is essential for a clean result:
- Lint Roll: Even tiny fibers or dust particles will turn into permanent blue or red dots once heated.
- Pre-Press: Place the shirt in the heat press for 5–10 seconds. This removes moisture and wrinkles, providing a perfectly flat surface for the ink.
| 💧 Expert Advice: Consistency is key. Our industrial-grade sublimation ink is designed to prevent head clogging while maintaining extreme color density.
4. Align and Secure the Transfer
Positioning determines the professionalism of the final product:
Place your printed design face-down on the shirt.
Use heat-resistant tape to secure the corners. Any movement during the pressing process can cause a double-image effect known as “ghosting.”
Place a sheet of butcher paper inside the shirt to prevent ink from bleeding through to the back, and another sheet on top to protect your heat press platen.
5. The Heat Press Process
Sublimation occurs when solids turn into gas under specific heat and pressure.
- Temperature: Set your press to approximately 200°C (400°F).
- Pressure: Use medium-to-firm pressure to ensure the gas is forced deep into the polyester fibers.
- Time: Press for 45 to 60 seconds.
| 🛠️ Hardware Spotlight: Uniform pressure is non-negotiable for large shirt designs. Our Holdwin Heat Transfer Machines provide the stability needed for professional-grade production.
6. Reveal and Cool
Once the timer goes off, the finishing technique is key:
- The “Hot Peel”: Lift the press and remove the sublimation paper in one smooth, steady motion while it is still hot. This prevents the gas from settling back into the paper and blurring the edges.
- Cooling: As the fabric cools, the polyester pores close, locking the ink permanently inside the strands.
| 🧼 Maintenance Tip: Knowing the mechanics of your gear saves time on repairs. Read our breakdown on how sublimation printers work to keep your nozzle checks perfect.
Why Quality Hardware Matters
Precision is the difference between a “hobby” look and a “retail” brand. Industrial-strength equipment ensures there are no cold spots or pressure gaps, which cause faded patches. At Holdwin, we provide the technical backbone for your success—from high-speed printers to wide-format heat machines that turn small workspaces into production hubs.
If you are ready to scale your production or need expert guidance on selecting the right setup for your business, our team is here to support your growth with technical expertise and reliable machinery.
| 🚀 Production Tip: Ready to move into mass production? See how our 8-head i3200-A1 printer handles high-volume orders without losing detail.
Conclusion
Learning how to do professional sublimation takes a mix of creative ideas and strong, industrial machines. By following these easy steps and using well-made tools, you can create clothes that stay looking new through years of wearing and washing.