German
  English
  Arabic
  Chinese
  French
  Portuguese
  Russian
  Spanish
  Polish
  Italian
Was Sie vor dem Drucken benötigen UV-DTF-Aufkleber?
Kernausrüstung und Verbrauchsmaterialien
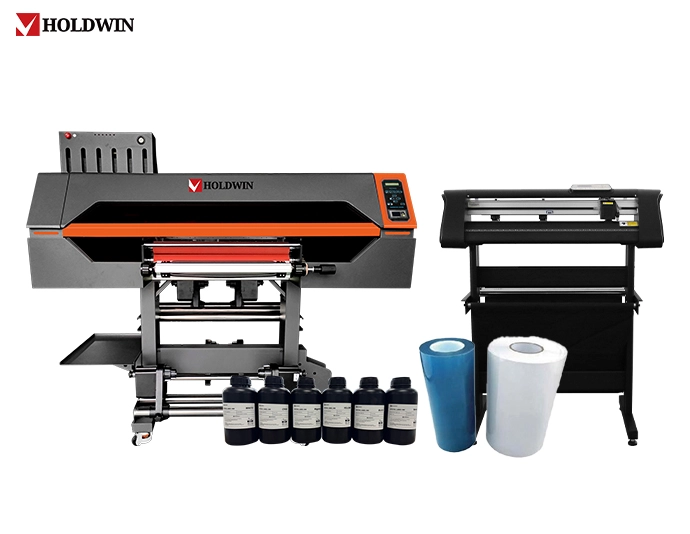 Bevor Sie UV-DTF-Aufkleber herstellen, bereiten Sie die richtige Maschine, Folie, Tinte, Software und Reinigungswerkzeuge vor.
- UV-DTF-Drucker: Die HOLDWIN-620 Pro UV Es eignet sich für 600 mm breite UV-DTF-Aufkleber, Kristalletiketten, Becheraufkleber, Verpackungsetiketten und personalisierte Produktdekoration. Die W+CMYK+V-Ausgabe ermöglicht die Erzeugung von Farb-, Weißtinten- und Lackeffekten in einem Arbeitsgang.
- UV DTF A/B Film: Eine Folie trägt das gedruckte Design während des Druckvorgangs. Eine Folie B dient dem Transfer und der endgültigen Applikation auf die Produktoberfläche.
- UV Tinte: CMYK erzeugt das Farbbild, weiße Tinte verbessert die Deckkraft auf dunklen oder transparenten Oberflächen, und Lack sorgt für Glanz und eine leicht erhabene Textur.
- Kristall-Etikettenschneidplotter: Es Schneidet UV-DTF-Mehrschichtfolien mit Klebstoff, weißer/CMYK-Tinte und Lack, unterstützt eine maximale Materialbreite von 720 mm und eine Schnittbreite von 600 mm.
- RIP-/Designsoftware: Nutzen Sie es, um Grafiken anzuordnen, die Druckgröße festzulegen, die Weißtintenschicht zu steuern, Lack hinzuzufügen und den Druckmodus auszuwählen.
- Reinigungswerkzeuge: Alkoholtücher, ein fusselfreies Tuch und ein Abzieher oder eine Schaberkarte helfen, Staub, Öl und Blasen zu entfernen.
Wie stellt man UV-DTF-Aufkleber Schritt für Schritt her?
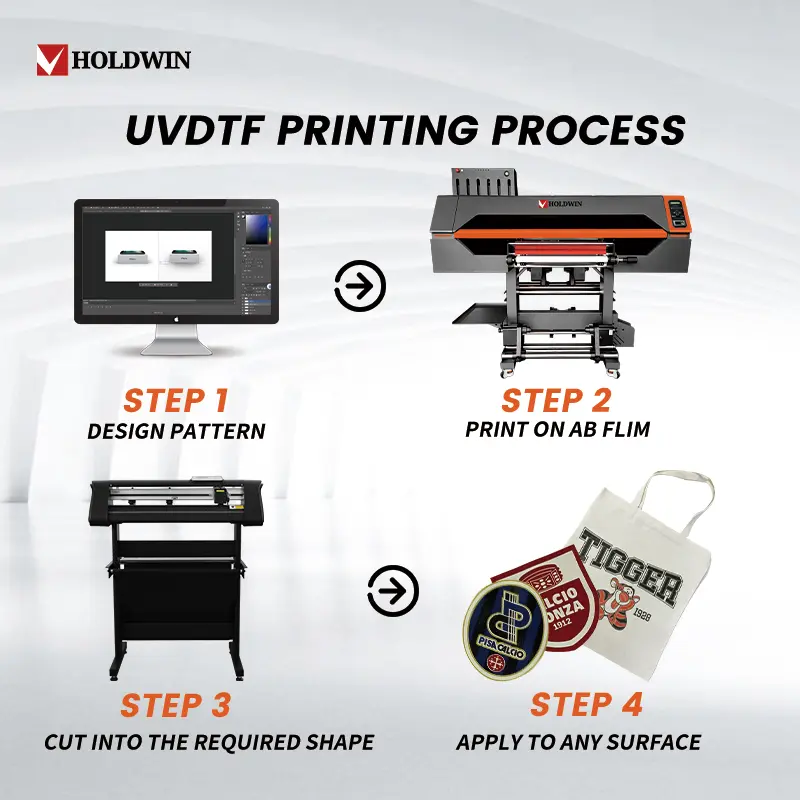
Schritt 1: Entwurfsmuster
Betrachten Sie zunächst den jeweiligen Anwendungsfall. Ein Becheraufkleber, ein Produktlogo, ein Kosmetiketikett, eine Handyhüllengrafik und eine Geschenkverpackungsmarkierung benötigen nicht denselben Grafikstil. Eine Bechergrafik kann kräftigere Formen verwenden, ein Verpackungsetikett benötigt möglicherweise schärfere Schrift und klarere Kanten, während ein kleines USB-Stick-Logo mehr Freiraum um das Design herum benötigt.
Gestalten Sie die Grafik mit klaren Kanten und vermeiden Sie feine Linien. Wenn der Aufkleber auf einer transparenten oder dunklen Oberfläche angebracht werden soll, fügen Sie unter der Farbschicht eine weiße Schicht hinzu. Für eine besonders hochwertige Optik tragen Sie auf ausgewählte Bereiche, wie z. B. die Logokontur oder das Hauptsymbol, eine Lackschicht auf. UV-DTF-Aufkleber Bei der Verwendung auf Einzelhandelsverpackungen wirkt ein leichter Lackeffekt oft besser als ein vollflächiger Hochglanz.
Schritt 2: Drucken auf AB-Film
Legen Sie den A-Film in den Drucker ein und senden Sie die Datei über die RIP-Software. Stellen Sie die Farbschicht, die Weißschicht, die Lackschicht, den Durchlassmodus und die Filmbreite ein. HOLDWIN-620 Pro UVDie Breite von 600 mm ist ideal für den Seriendruck. Sie können viele kleine Logos, Becheraufkleber, Warnhinweise oder Geschenkanhänger auf einer Rolle anbringen, anstatt jedes Element einzeln zu bedrucken.
Schritt 3: In die gewünschte Form schneiden
Sobald die Druck- und Laminierprozesse abgeschlossen sind, geben Sie das bearbeitete Material hinzu. AB film. Verwenden Sie das präzise Konturverfolgungssystem des Schneideplotters, um die gedruckten Grafiken genau in die benötigten Einzelformen oder Blattgrößen zu schneiden.
Die Verwendung eines speziellen Schneideplotters gewährleistet saubere, professionelle Kanten und ermöglicht die effiziente Trennung großer Mengen Ihrer im Mehrkomponentendruckverfahren hergestellten Aufkleber, bevor diese verteilt oder angebracht werden.
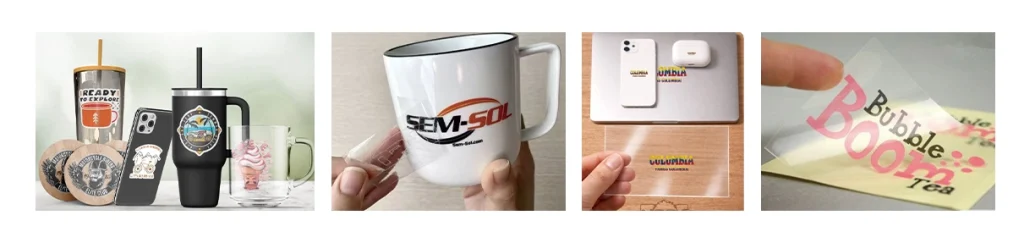
Schritt 4: Auf jede beliebige Oberfläche auftragen
Vorbereitung: Reinigen Sie den Gegenstand vor dem Aufkleben gründlich. Staub, Öl, Wasser und Fingerabdrücke sind häufige Ursachen für schlechte Haftung. Verwenden Sie Alkohol und ein fusselfreies Tuch und warten Sie, bis die Oberfläche vollständig getrocknet ist.
Abziehen & Platzieren: Die Transferfolie vorsichtig abziehen. Bei flachen Gegenständen die Folie von der Mitte aus auflegen und nach außen drücken. Bei gewölbten Oberflächen wie Tassen oder Flaschen zuerst die Mitte fixieren und die Folie dann langsam zu beiden Seiten abrollen. Sobald die Folie die Oberfläche berührt, nicht mehr anheben und bewegen.UV-DTF-Aufkleber sind nicht für wiederholtes Umpositionieren geeignet.
Veredelung: Drücken Sie den Aufkleber mit einer Rakelkarte fest an und achten Sie besonders auf Ecken, dünne Linien und kleine, separate Bereiche. Ziehen Sie die Schutzfolie langsam und in einem flachen Winkel ab. Prüfen Sie abschließend Kanten, Farbe, Glanz und eventuelle Blasen, indem Sie die Fläche um das Motiv herum mit einem sauberen Tuch andrücken. Das fertige Etikett sieht aus wie ein makelloser Direktdruck.
Häufig gestellte Fragen: