Personalized drinkware continues to dominate the custom merchandise market, with sublimation mugs leading the charge. Unlike standard printed cups, sublimation mugs feature a specialized polymer coating that permanently fuses heat-activated inks directly into the ceramic. The result? Ultra-vibrant, scratch-resistant designs that won’t peel or fade over time.
In this guide, we’ll cover the essentials of mug sublimation, including the sublimation supplies you’ll need and the steps for achieving excellent transfers.
What Is a Sublimation Mug?
A sublimation mug is a ceramic mug coated with a special polyester-based layer that allows heat and sublimation ink to fuse a design directly into its surface. Without this sublimation coating, the transfer ink cannot bond with the mug.
With a proper sublimation mug, you can leave a permanent design that offers sharp details, vibrant colors, and long-lasting durability. These mugs are practical for everyday use.
Essential Equipment & Sublimation Supplies Checklist
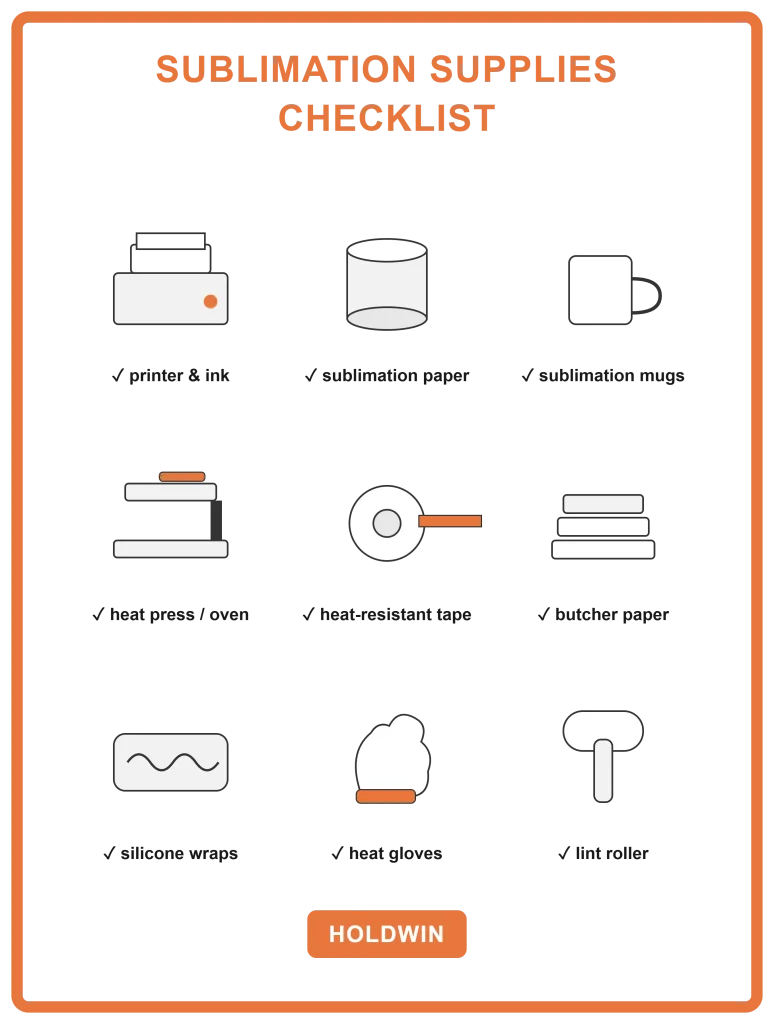
Here is a complete, step-by-step checklist of sublimation supplies and equipment needed for custom sublimation mug printing.
Sublimation Printer & Ink: A dedicated inkjet setup (standard office printers will not work).
- Sublimation Paper: High-release transfer paper.
- Sublimation Mugs (Blanks): Must have a specialized polymer/polyester coating.
- Heat Source: A cylindrical mug press machine or a dedicated convection oven.
- Accessories & Safety
- Heat-Resistant Tape: To secure the design tightly without melting.
- Uncoated Butcher Paper: To protect your press/oven from ink blowout.
- Silicone Wraps: Required for firm pressure if using an oven instead of a press.
- Heat Gloves: Crucial for handling mugs heated to 180°C.
- Lint Roller: To remove dust from the mug prior to pressing.
Step-by-Step: How to Sublimate a Mug
Step 1: Choose the Right Mug Blank
Always use coated mugs made specifically for sublimation printing.
- Standard Tea/Coffee Mug (325 ml): This is your typical office or home coffee mug—the most popular size for everyday tea or coffee. It’s affordable, easy to print, and the top choice for bulk gifting.
- Large Mug (440 ml): A bigger option for those who like extra-large servings of tea, soup, or milk. It offers a larger printing surface, making it great for detailed designs and premium gift sets.
Step 2: Prepare Your Artwork
Sizing your design accurately to the printable area is critical. Always mirror (flip horizontally) your image before printing so graphics and text orient correctly once transferred. If your design has a full bleed background, extend the background slightly to reduce white edges.
Step 3: Print the Transfer
Print your design on sublimation paper using your sublimation printer settings. For best color accuracy, use the proper print settings and profiles recommended for your ink/printer setup.
Step 4: Clean and Prep the Mug Surface
Before taping the transfer on, remove dust and debris. A lint roller is helpful for preventing tiny specks that can create blue dots or imperfections in the final press. Make sure the mug is clean and dry.
Step 5: Tape the Transfer Securely
Wrap the printed graphic tightly against the coating, securing it with heat-resistant tape. A snug wrap prevents paper shifting during pressing—the main cause of blurry “ghosting” artifacts.
Step 6: Press the Mug
Preheat your mug press (typically 180°C–200°C / 360°F – 390°F for 180–240 seconds, per manufacturer guidelines). Clamp the mug firmly to apply medium-to-heavy pressure. For equipment settings and hardware specs, reference Holdwin Heat Press Machinery.
Step 7: Remove, Cool, and Inspect
Once the timer goes off, wear heat-proof gloves and carefully take the mug out of the machine. Peel off the sublimation paper right away while it’s still hot, then set the mug aside to cool down. Check your finished mug—you should see bright, sharp colors with your design printed evenly all around!
Mug sublimation troubleshooting
| Issue | Likely cause |
| Faded or washed – out color | Underpressing ( too little time or too low temperature) |
| Blue or dark speckling | Dust or lint trapped under the transfer |
| Ghosting or blurred lines | Transfer shifted during pressing – wrap wasn’t tight enough |
| White edges around the design | Artwork wasn’t extended to fully cover wrap area |
| Uneven color across the mug | Inconsistent polymer coating on the blank |
Final thoughts
Mug sublimation is a forgiving process once you’ve got a repeatable workflow — the same seven steps apply whether you’re printing one custom gift or running a full production batch. The biggest wins come from getting the fundamentals right: a quality blank, accurate color profiles, a tight wrap, and press settings matched to your specific equipment.
If you’re scaling up mug production and want to explore industrial sublimation printers, inks, and papers built for consistent, high-volume output, take a look at Holdwin’s sublimation printer and consumables ranges.